
How To Use Images In Your Blog
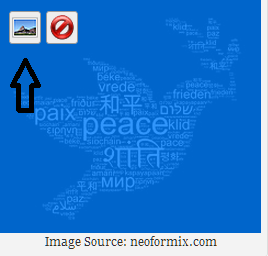
Image Source: mackdawgproductions.com
Wait! What? There’s a right way to use images on my Blog?
Yes!
First of all, if you are not using images then you are doing yourself and your readers a disservice and there are at least 5 Ways Images Make Your Blog Better (for those of you who haven’t used images yet, this will get you started on the right foot). But, let’s assume you are already using images. What could you possibly do better?
There are many ways to use images. Some Bloggers simply insert them into their posts with little thought beyond why they want to use them. This practice is not only potentially illegal because of copyright, but it is also unfortunate because you are not taking advantage of technology and the never-ending human consumption of images.
Writers want readers. What’s the point in writing in a public forum if we do not want to do everything we can to get our words in front of as many eyes possible right? Also, if someone where to take our words and share them as their own it wouldn’t be very nice would it? Exactly.
So, here’s how to use images in your Blog.
“Image”
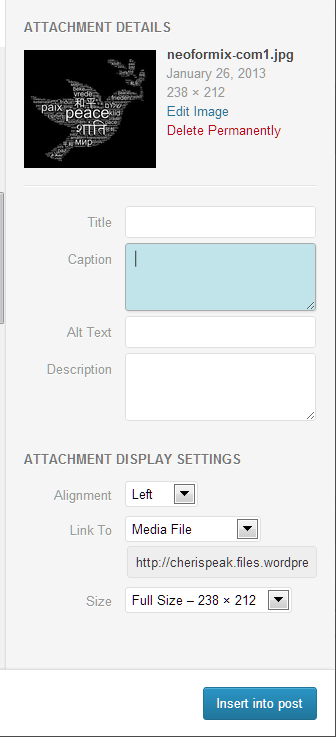
When you open a new post and go to insert an image the media gallery will open. Once you have an image chosen there are text fields on the right hand side where you need to type in a little image info (if you titled your image when you captured and saved it there will already be a title in the “title” field however you can change it at any time. In the example below I have left all fields blank for demonstration purposes.
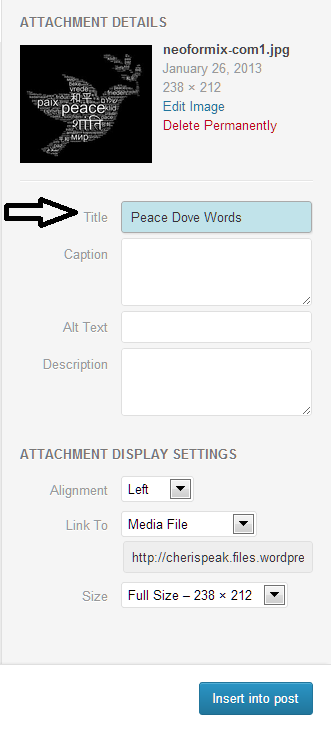
“Title”
Giving a “title” for your image is important, not only for your own organizational purposes, but also in beefing up SEO. Personally I create a title that is the same as the “Alt Text” I choose. You can title your images however you’d like. I have several images that are “peace doves” so in this case I added the word “words'” to make it easier for me to find since this particular image is created from words.
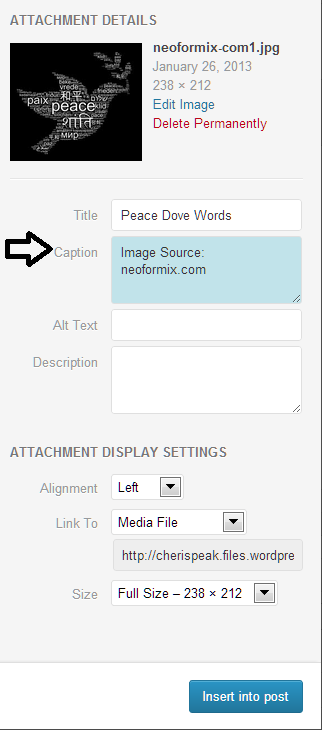
“Caption”
Attribution aka giving credit where credit is due. If the image is a photograph or graphic you took or created add your own name or the name (or URL) of your Blog. Most often the images we use do belong to someone else and giving proper credit isn’t only a practice in proper etiquette, it’s the law. Some people are content to receive credit while others may ask you to remove their images (which you should do immediately if asked). Either way, giving credit is always appropriate and the “Caption” area of each image is the best place to do it. It keeps the image and it’s credit together so there is never any question as to where the image originated. It is worth noting that many images we find may not have the correct creator anywhere that it is apparent in order to give credit, but you should still give attribution to wherever you captured it from.
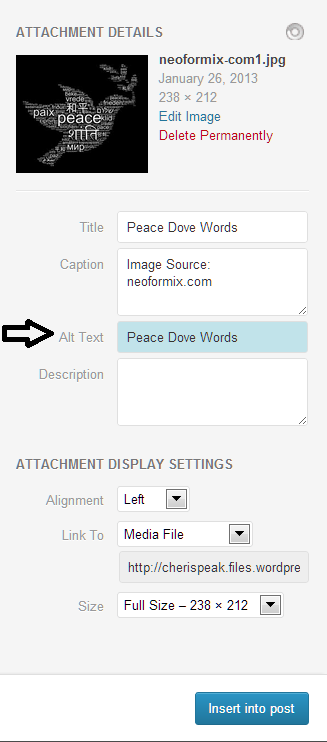
“Alt Text”
The “Alt Text” field is the most important field and should never be overlooked. This is where you “tag” your image for search engines using key words. When you choose each images key words be sure they are appropriate to the image. In other words, if your image is a “peace dove” you don’t want to title it “bird”. Think about the key words you use when you are looking for images or information on-line. Don’t try to be too technical because chances are the person looking for your image will use the same or similar terms as you did.
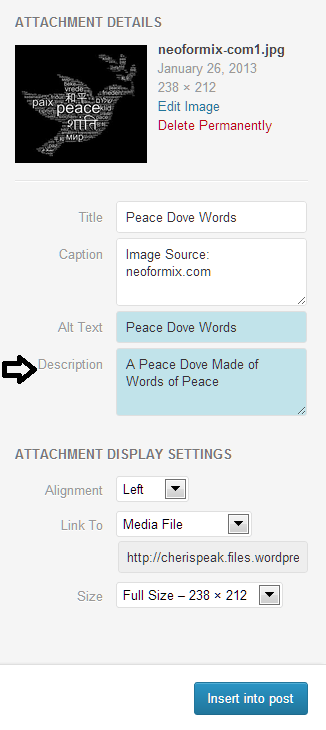
 “Description”
I admit, I often leave this field blank. There is no major purpose for the field except for further organization of your images in your gallery. It does not help with regard to search engines or SEO so if you are going to skip a step, this is the one to skip.
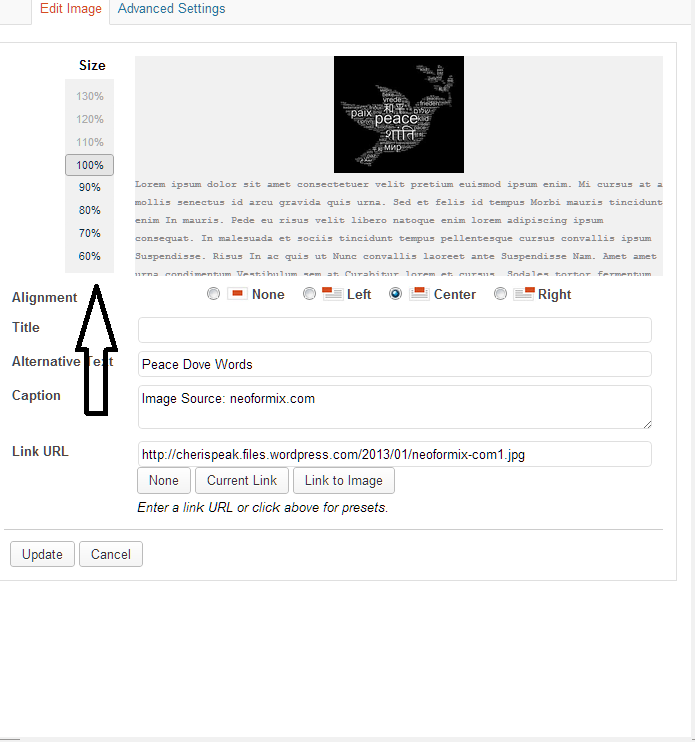
“Alignment”
This is where you designate how you want the image placed on your page. You can choose to have images centered above and below text as it is in this post where I have dropped the images of the formatting fields to demonstrate my points. This is a good way to use images for “How-to” type posts. You can also choose to stagger your images with your text wrapped around them as I do in the opening paragraph of this post. It is truly a personal choice. If you are doing “content” writing for someone else’s Blog or website, they will have guidelines that you need to adhere to however, if it is your own Blog do what is appealing to you. I choose a text wrap staggering my images left to right in nearly all of my articles/posts. I like the look much better because it reads more like a magazine or newspaper and the staggering effect keeps drawing my readers further down the page. Doing it this was I am able to put images in-line with the text they represent keeping everything in context. I have found that Blogs who use large images centered often loose me because I don’t think there is more to read beyond the image. Food for thought.
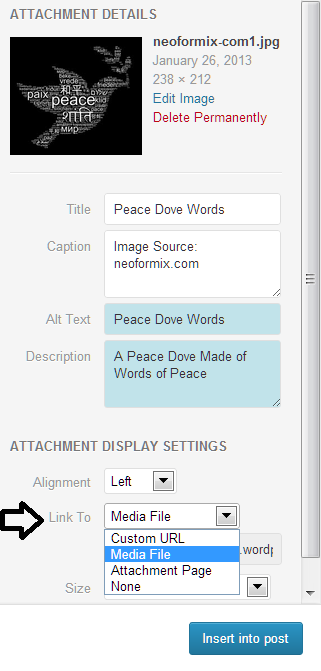
 “Link To”
This is another important choice you need to make and it really is entirely up to you, but there are pros and cons of each decision. Do you want people to click on an image and be able to see it in a larger size? Do you want people to click on an image and it links to your home page or the same page the image is presented on? Or, do you want people to click on an image and be taken to the image’s source, i.e. somewhere else away from your Blog? Personally I always choose “media file” so the image will open to a larger size. This enables me to use smaller images in my posts, but in the case of diagrams, etc. a reader can click on it and make it bigger to see more detail. I never choose to have an image linked to its source because I never want to send someone off of my page. If I am giving proper attribution in my “Caption” there is no reason to send a reader away because who knows if they will come back and finish reading. When you add links into your text body you have the option for the link to “open in a new window” keeping the reader on your own page at the same time. With images there is no such option in the WordPress platform.
“Size”
Does size really matter? Yes, but it only really matters for a couple of reasons. As I have pointed out above, sometimes an image needs to be seen in a larger size so that people can read statistics, etc. I choose size for clarity and fit however I never size my images from this section. Here I simply choose “full size”. Once the image is inserted I can then click on it and then the edit button to change it to the perfect size to fit where I want it to appear.
Images are an important part of Blogging. Their use can offer so many benefits it is hard for me to understand why anyone wouldn’t want to use them. What’s more is if you use images properly you have nothing but new readers and a deeper appreciation of your Blog to gain.
Related articles
- Quick Tip: Using alt Text Properly (a11yproject.com)
- How to Write the Perfect Blog Post (scalablesocialmedia.com)
- Facts To Be Known About Blogging (blogfully.com)
- Blogging Basics – Is A Photo Important? (dadblunders.com)
- Optimizing Images for SEO (webdesign.tutsplus.com)
- Image Alt and Image Title (epiphanysolutions.co.uk)
- 4 Ways to Make Your WordPress Site More Accessible (sitepoint.com)

Great article Cheri! I like your “how to’s” posts because its easy to follow and doesn’t feel like work reading through it. It’s simple enough to follow and engaging. P.s. I made a Pin Interest…it is endlessssss, my temptation is weak to walk away LOL.
LikeLike
Thank you very much. I get a lot of people that ask me “hot to” do this or that 🙂 … you will love Pinterest, but remember don’t get lost there, we need you writing on your Blog! :p
LikeLike
Excellent article, Cheri. I’m always ‘stumbling around’ with my images 😉
LikeLike
Thank you Di. I like to find the positive in everything I use and how it can help me gain more readers.
LikeLike
Great article. I’m going to have to remember this when I eventually get some pictures to post on my blog.
LikeLike
LOL I think you are getting busy catching up with all the social media and now images :p
LikeLike
It’s definitely become a busy and high learning week. 🙂
LikeLike
Thank you for this post. I am a new user here, and new to blogging period, and I feel childish that I didn’t know where or how to source my images, so i didn’t really put them in. Now I get to add in all my photos!! 🙂
LikeLike
Aww there’s nothing childish about learning something new. If we knew everything, we’d be bored 😉
LikeLike
Thanks for linking to our article, “How to Write the Perfect Blog Post”, Cheri! Your post is really great for beginning bloggers, especially with the print screens you included.
LikeLike
Thank you and you are very welcome Alisa. Your article is great too.
LikeLike
Pingback: 5 Ways Images Make Your Blog Better « Cheri Speak
Pingback: Why I Justify « Cheri Speak
Pingback: How To Use Images In Your Blog- Cheri Speaks | Bold Spicy News
I had no idea about the importance of alt text and title. I’ve just been leaving alt text blank and my title just stays the same as the file name. Now that I know how impotant it is, I will start using it. Do you caption images you have taken yourself or do you leave it blank in this instance?
LikeLike
I always give a credit (caption), even to myself if they are my own images 🙂
LikeLike
Wow, I didnt know half of this, as some others have said I simply didnt realise that any of the other boxes mattered…I suppose they wouldnt be there if they didnt though would they? lol. Great post! (Stumbled across your blog from the DPChallenge post)
LikeLike
Thanks!! Shall I catch since you stumbled in? Break your fall or something? :p
Yes the other “boxes’ do matter. LOL but hey there was a time I didn’t know either.
I just saw your images on your blog. LOVE.
LikeLike
I just saw you saw lol, thanks for catching 😉
LikeLike
Well of course. I mean i don’t have any blog owners insurance or anything. I wouldn’t want you to sue me if you conked your head on my keyboard or something! rofl 🙂
LikeLike
So helpful! thank you – now I need to go clean up the images I used and next time I’ll know better.
LikeLike
It took me a while to figure it out. Each blogging platform is a little different, but tags and titles are super important to search engines so it is worth getting the hang of. Good luck!
LikeLike
One of my most regular (Though not largest, but I get every month several views from it) referrers is google to an image of mine. (Another reason to include images!)
Knowing that it’s the alt text that they look for is a nice info though 😀
LikeLike
Yepx3!!! Alt text is the key!
LikeLike
Reblogged this on Cheri Speak Media.
LikeLike
Pingback: Better Blogging SEO: From Titles to Tags | Cheri Speak
Pingback: How To Customize Your Blog For FREE! | Cheri Speak